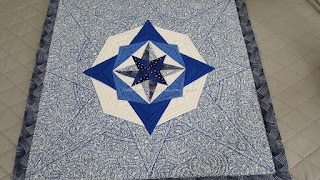
Stand Up Divas Challenge 2017 Piecing Challenge?
This year’s challenge seemed like a really fun idea! Everyone that participates will create a block, finished at 18.5″ bound that would become a block in a “sampler” quilt with all our blocks pinned up on the design wall. For unity, this used one focus fabric that Debbie supplied (Quilting Quarters in Conroe where we meet each month) and we were to use a white background.
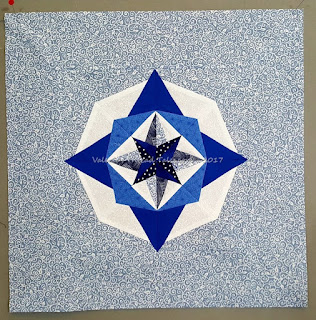
Notice I say…. seemed like a fun idea LOL! My first idea was to make a Compass /NY beauty block of some sort and have part of it missing and finish off the design with quilting. Well I was hitting the wall with the actual design and the 18.5″ block…. Then I thought I would do a simple HST type block and just quilt a beautiful feather design like I did on my Amish With a Twist 3. Perfect. Then I really looked at the focus fabric. Oh my word this really was a longarm challenge! No way in the world to EVER get any quilting to show on that fabric. So then I started looking online for the proper sized blocks, NY beauty blocks etc. I did not find ONE pattern sized out that size. I did actually find lots of patterns I wanted to make though LOL! Focus fabric it the swirly almost black fabric used in the 2nd inside set of star points and also used as a sashing.
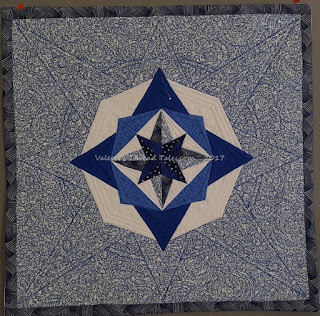
I finally chose the Bowie block. The pattern for the paper piece block I used can be found HERE. It only makes a 12″ block but I could see how to extend that next section at a 45* angle to get it to the size I needed. When I printed my papers, each quadrant only measured 5 3/4″ inch finished but I did not deal with trying to enlarge the pattern. I opted to just increase the amount I needed to add to the outer section to bring this up to 18.5″. No problems Next, I start pulling fabrics and I’m wanting to bring out my solids…. I double check the guidelines. Nothing but Blue and White. What? How was I going to accomplish this… a scrappy quilter… and my love of solids which were perfect for this block? I already knew that I needed only a slice of that busy focus fabric. Perfect for an interior star point. But the rest? I wanted to make each section 2 toned like one example I had seen. More defeat. I could not add that many blues and keep it maybe blending with what others choose for blues.
So, once again this challenge turned into a PIECING challenge! 2014 was my first year and I really had fun changing the pattern into something that appealed more to my style of quilting and it even won a few awards at local shows including a Judges award for Design! How cool is that?! 2015 found me very busy, I don’t even remember the pattern but maybe it did not appeal to me… not sure but mostly due to time constraints… I did not participate. 2016 almost found me not participating even though I had purchased fabric and backing to make the full size pattern as submitted to us! I could not let that happen though and took off 3 days. I created a wallhanging using 3 blocks from the pattern and LOTS of negative space for quilting. Now that one turned into a longarm challenge for me with oodles of quilting… also with a time limit of 3 days to piece quilt and bind.
This one, with the focus fabric and other fabrics that I felt blended with the focus fabric color… left me little area for detailed quilting. I could not even find a remnant of wool batting in my stash and refused to cut a strip off the bolt for an 18″ block. I used a layer of QD 70 /30 as a base and a layer of Hobbs 80/20 on top of that. It worked OK. I have texture. It was a good experiement and I would do it again except ultimately I KNOW I would have loved wool so much more.
I did bring in another technique that I have seen Jamie Wallen use on straight lines to bring in more bold color. You will see below that we can see texture but even using Royal Blue thread… it just disappears into that swirly fabric. So….I tried my hand at thickening the line! By golly I think it worked. While not an heirloom or work or art… it’s just everyday quilting for me, I did utilize a new quilting technique, a different 2 layer batting combo for me that does work well and overall I do like the block! Next problem…
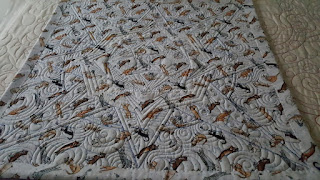
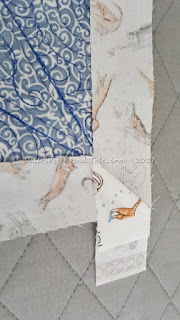
Shrinkage! I really have no idea how to plan for quilting shrinkage. I contemplated leaving my unit larger (I did make larger so that I could square up exactly at 18.5″). But then how exactly would I know where to place my star points? I had my star points ending 1/2″ away from the raw edge so that they would not get stitched over with binding. I could not wrap my brain around how to plan for shrinkage and quilt with this design. So I trimmed at 18.5″. Of course, it was smaller than that after quilting with 2 layers of batting… I tried just misting with water and stretching out. YIKES! A neon yellow started showing through on my blue swirly fabric. Glue stick. Oh my gosh. So I had to submerge the entire block. With the end result being with blocking…. 17.5″ Now what. I told you this was once again a PIECING challenge for me not a longarm challenge! Originally, I was going to bind with the focus fabric with a 1/4″ binding. I decided I had enough batting to do a “quilt as you go” method of stitching down strips (I said forget it I’m not mitering these intersections), then trim up to desired sized. I would face the back to cover the raw edges. I wasn’t going to miter those corners either. Well…. I could not figure out how to do it without mitering the facing LOL! I had no clue how to make math work for me… so I layed out corner by corner and made each miter fit exactly that turn. My gosh what an ordeal. And I could have been working on my real quilt that I would like to have in a show! SMH.
Anyway, she’s done. I’ll just call her Bowie Blues. Reveal is the 19th! I can’t wait to see what everyone does. I imagine a lot of white backgrounds in these blocks. Mine may be different?!


